Chef - Scale a website using OpsWorks
This is a tutorial on how to scale your web application using Chef in AWS OpsWorks.
The cookbook code is posted on on GitHub and contains all you need to have the stack up and running. Simply browse to the Releases section and get the latest version.
What is Chef?
Chef is an open-source software that allows you to deploy and maintain your infrastructure as code.
With Chef you can manage servers – 5 or 5,000 of them – by turning your infrastructure into code. Time-consuming activities like manual patching, configuration updates, and service installations for every server will no longer exist. And your Infrastructure becomes flexible, version-able, human-readable, and testable
Each system you manage can be configured to run the chef client regularly, which will pull the policies you define from a Chef Server, apply them locally, and send back a summary of their run. The Chef Server then becomes your source of truth — a single place where updates can be made, and automatically pulled in by the systems you manage the next time they check in.
What is OpsWorks?
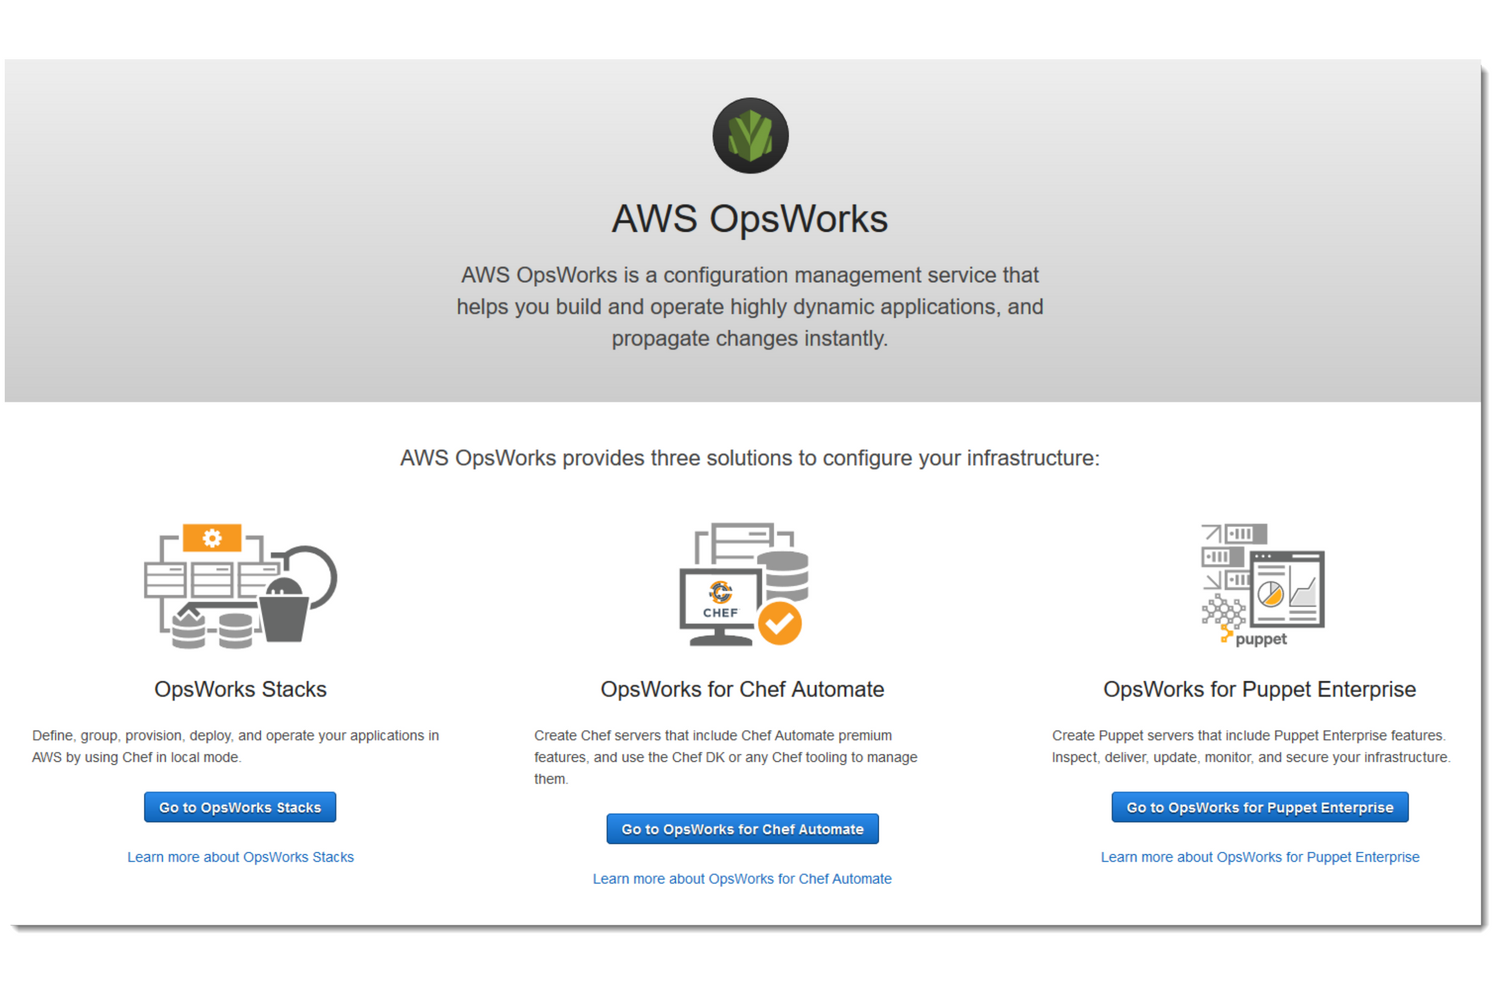
AWS OpsWorks is a configuration management service that helps you configure and operate applications in a cloud enterprise by using Puppet or Chef. AWS OpsWorks Stacks and AWS OpsWorks for Chef Automate let you use Chef cookbooks and solutions for configuration management, while AWS OpsWorks for Puppet Enterprise lets you configure a Puppet Enterprise master server in AWS. Puppet offers a set of tools for enforcing the desired state of your infrastructure, and automating on-demand tasks.
For this tutorial, we're going to focus now specifically on AWS OpsWorks Stacks.
AWS OpsWorks Stacks, the original service, provides a simple and flexible way to create and manage stacks and applications. AWS OpsWorks Stacks lets you deploy and monitor applications in your stacks. You can create stacks that help you manage cloud resources in specialized groups called layers. A layer represents a set of EC2 instances that serve a particular purpose, such as serving applications or hosting a database server. Layers depend on Chef recipes to handle tasks such as installing packages on instances, deploying apps, and running scripts.
Deploy the stack
Configure the cookbook settings
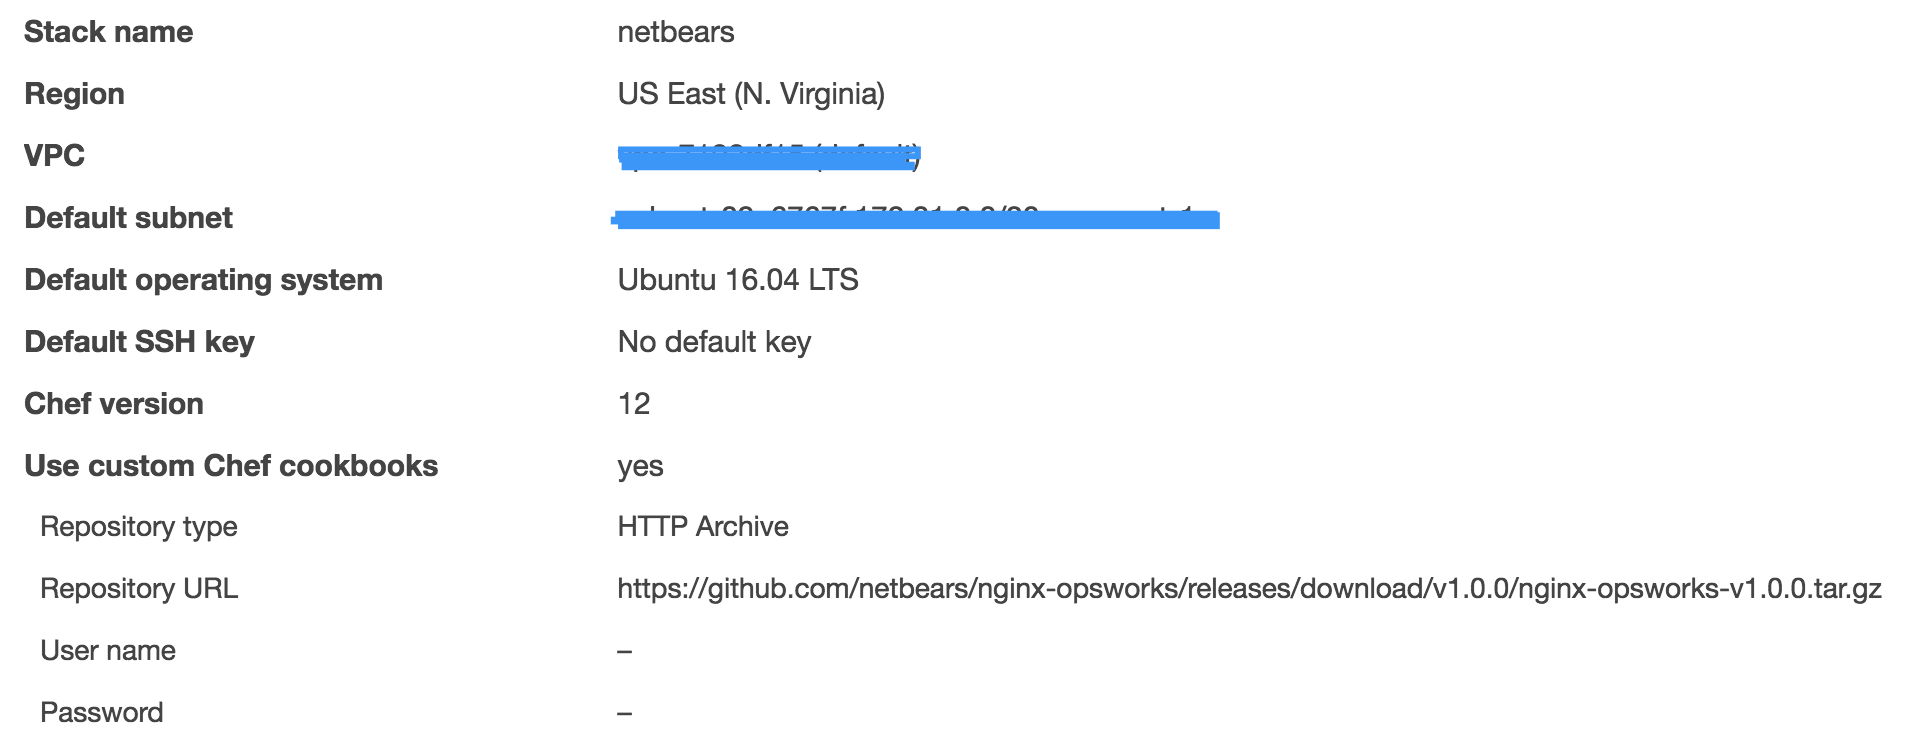
First you would need to browse to the "OpsWorks" page and create a new stack. Make sure you select all appropriate VPC and subnet properties in order for your instances to be able to connect to the outside world.
After that, make sure that you configure the Custom Cookbook settings to match the URL of the latest release in our GitHub repo.
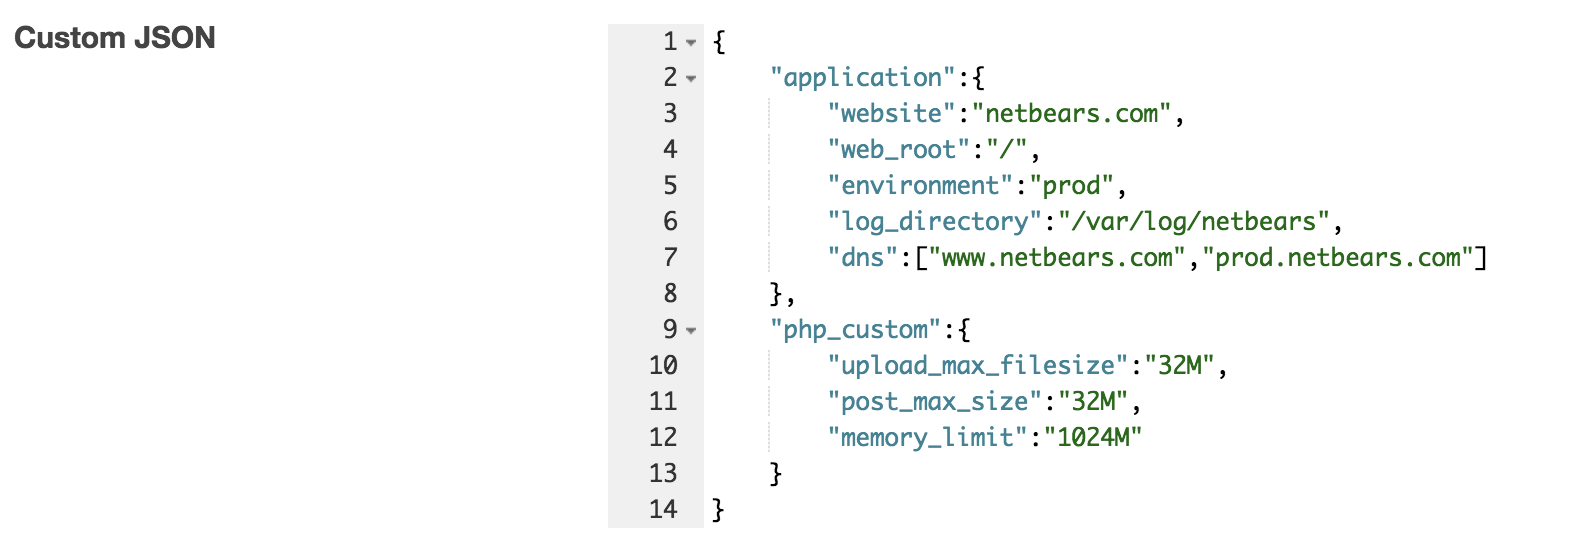
After that, scroll to the bottom, expand the "Advanced Settings" link, and let's configure a bit our stack by editing the CustomJSON configuration.
Let's go through the options a bit:
- ["application"]["website"] -> main hostname under which your webapp is accessible
- ["application"]["web_root"] -> path within your GIT repo under which the app is hosted
- ["application"]["environment"] -> label to set the environment in which this application is deployed
- ["application"]["log_directory"] -> path under which to store all nginx logs that your app generates
- ["application"]["dns"] -> alternate DNS domain under which your app should also be available
- ["php_custom"][....] -> PHP custom variables and values
Create a layer
Layers are the logical "platform" in which OpsWorks launches instances.
You can launch multiple layers with one or more instances and can set up different parameters for each of them, in order for them to either deploy multiple applications or launch instances with different settings.
To launch a layer, the process is pretty basic:
- Click on "Layers"
- Define a "name" and a "shortname" and hit Save
Set up runtime recipes
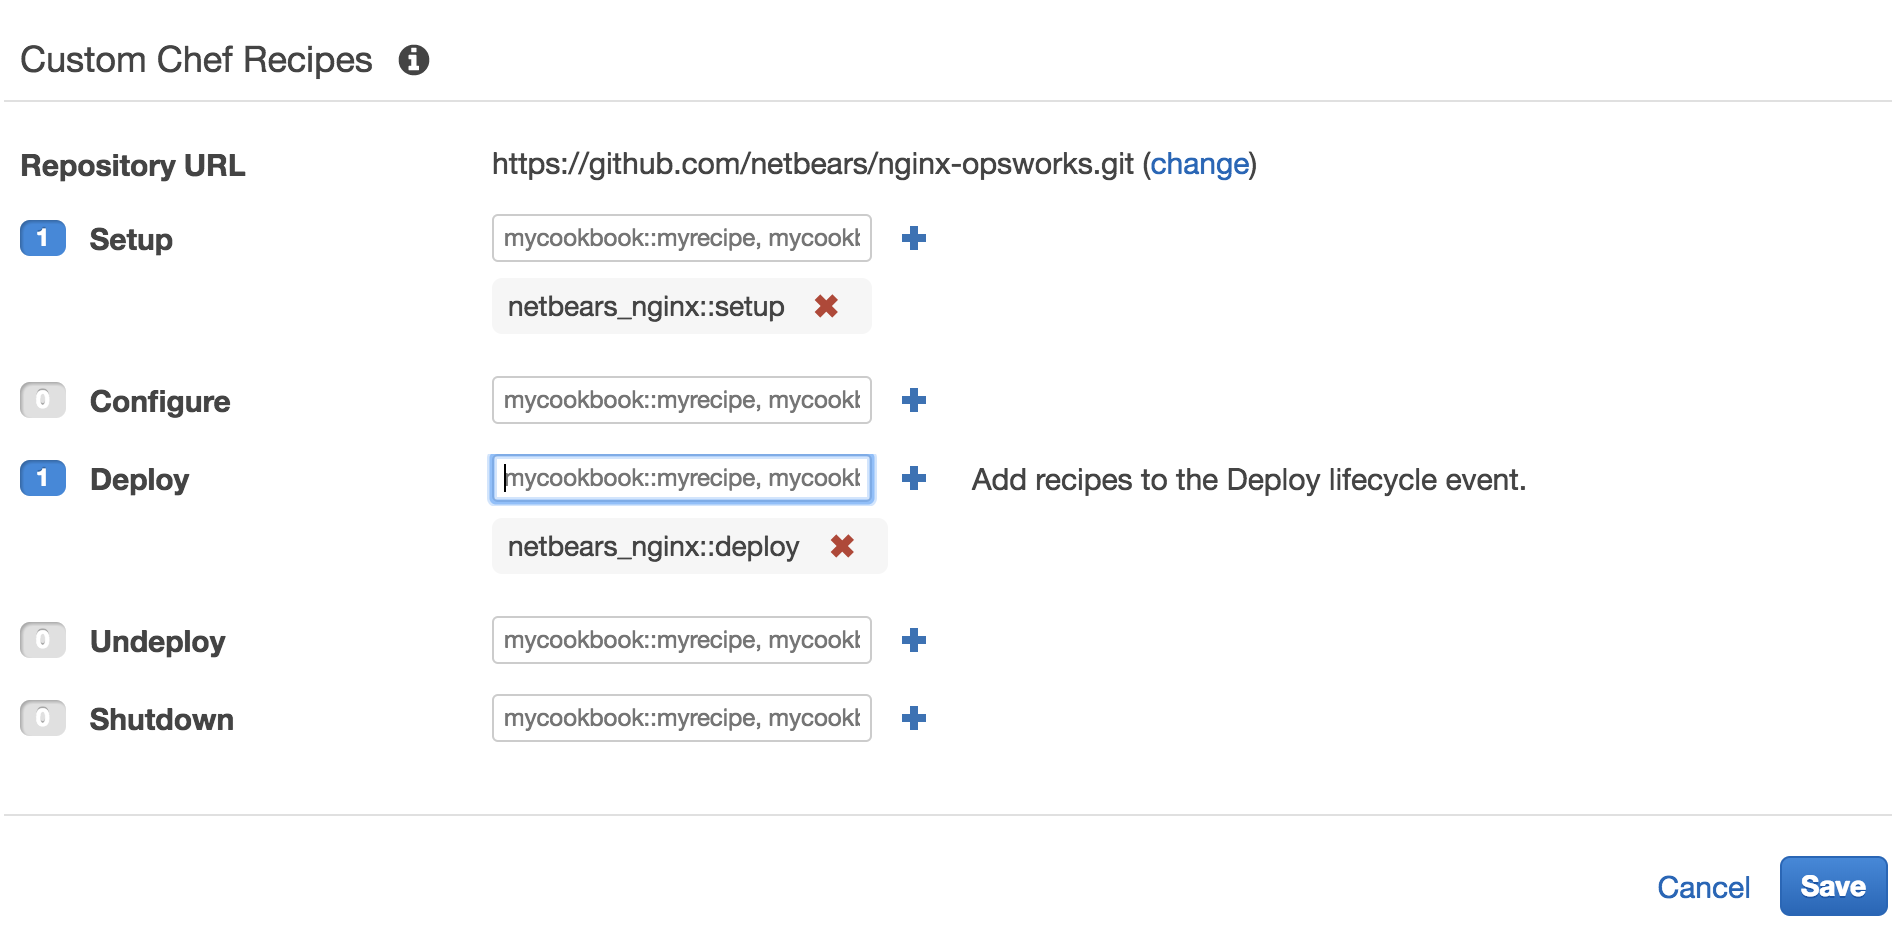
Now that we have a layer, we should set up what exact recipes are running on it.
These recipes define what packages are installed, at what step they will be installed, and in what order. To configure the, select your Layer and click on the "Recipes" tab and add them as per the below screenshot.
Set up an Elastic Load Balancer
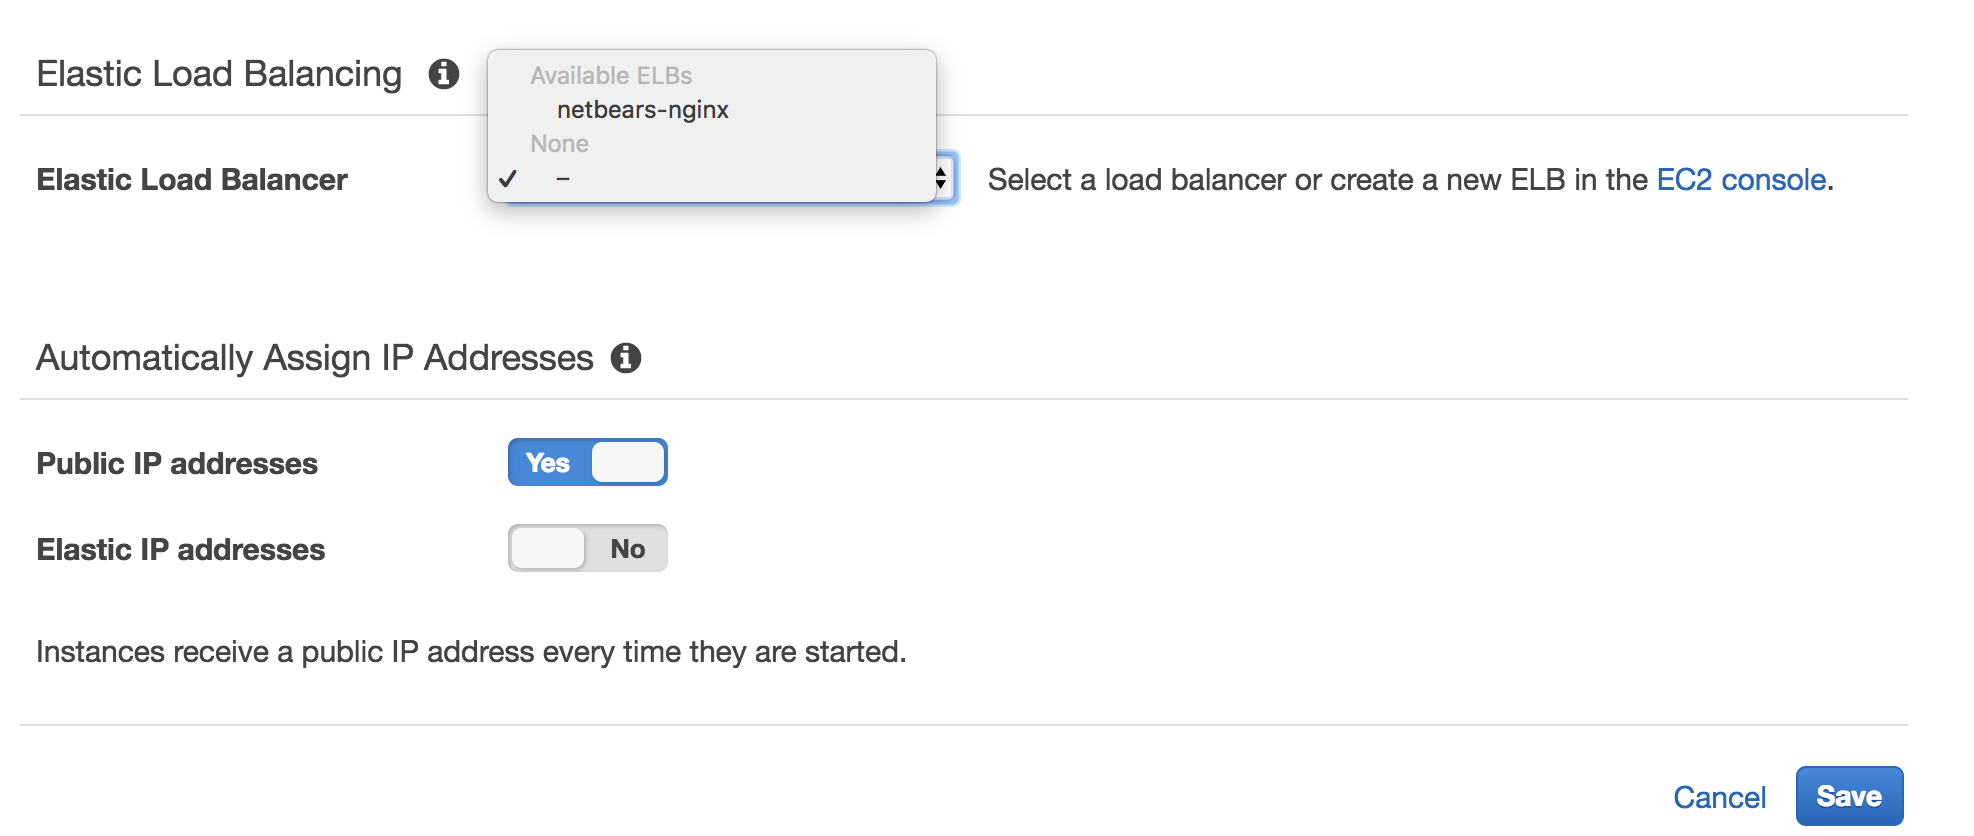
Let's make sure now that we are able to launch multiple instances at the same time and load balance them. To do that, we're going to append on already existing Load Balancer to the layer.
Unfortunately though, at the moment, OpsWorks provides out-of-the-box support only for Classic ELBs, although there are a few methods out there with which you can use an Application Load Balancer instead.
Assuming that you already have a Classic ELB that is not in use, then all you need to do is just select the "Networking" tab, attach it and hit "Save".
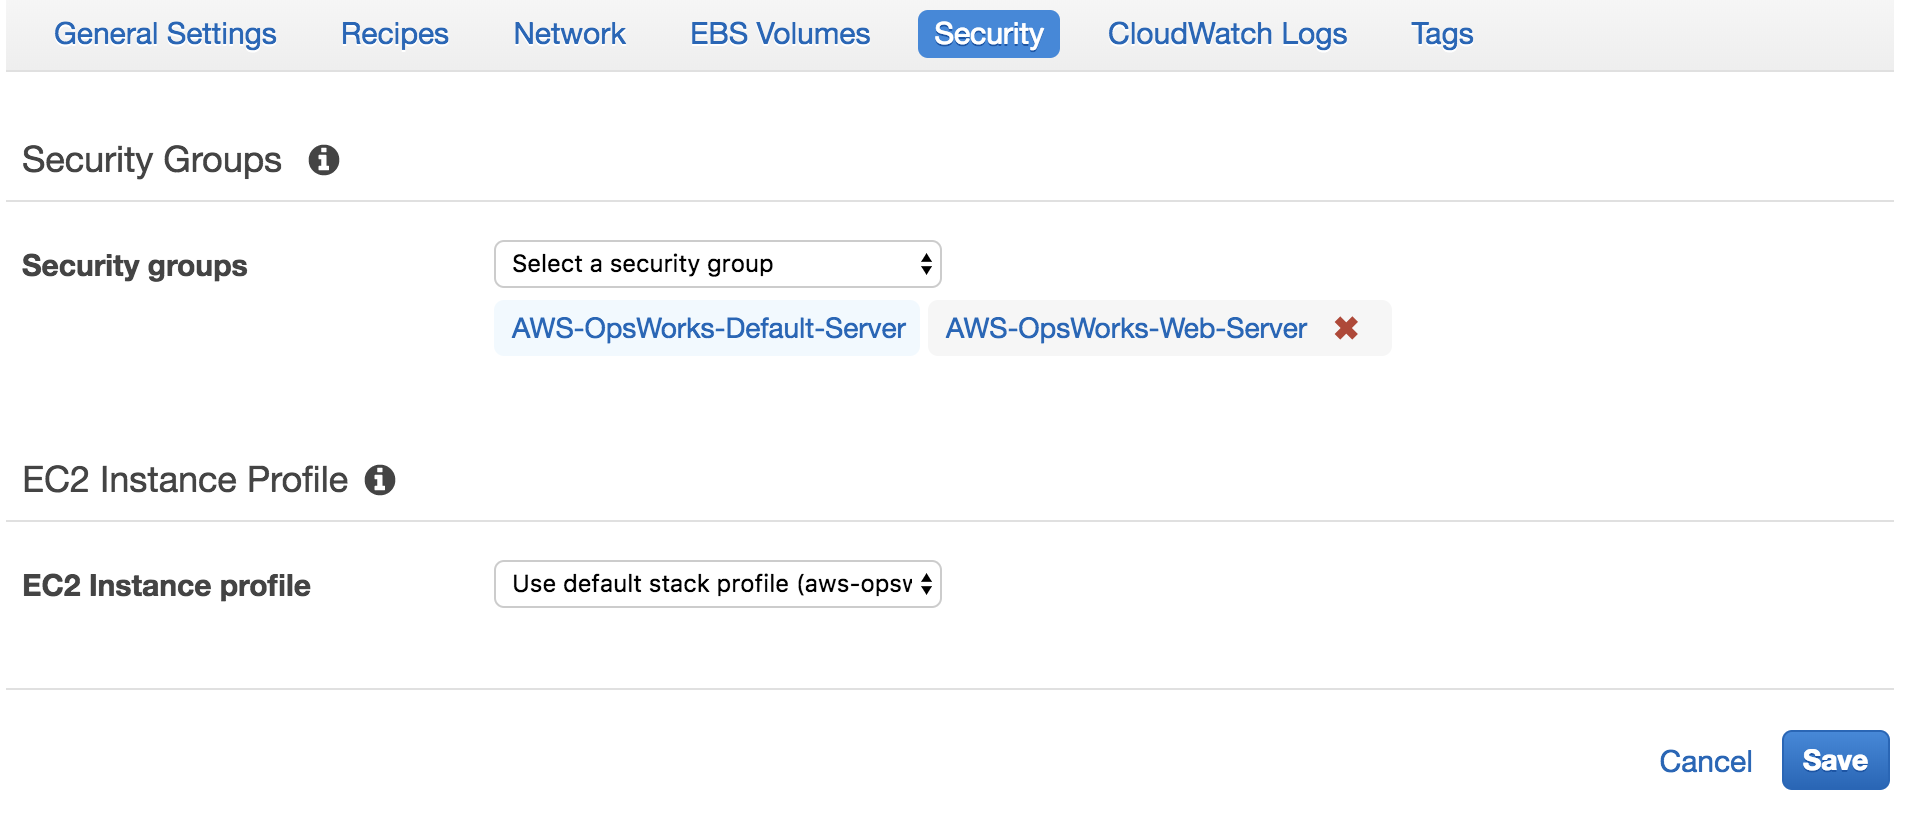
Set up network access
Depending on your webapp, you might need specific ports to be opened for specific CIDRs.
In our case, since we're just deploying a Wordpress app, we're just going to use the standard configs to serve all traffic on port 80.
In any case, all you need to do is just create your security group in the same VPC as the one that your launching the instances in, and select it from the dropdown in the "Security" settings.
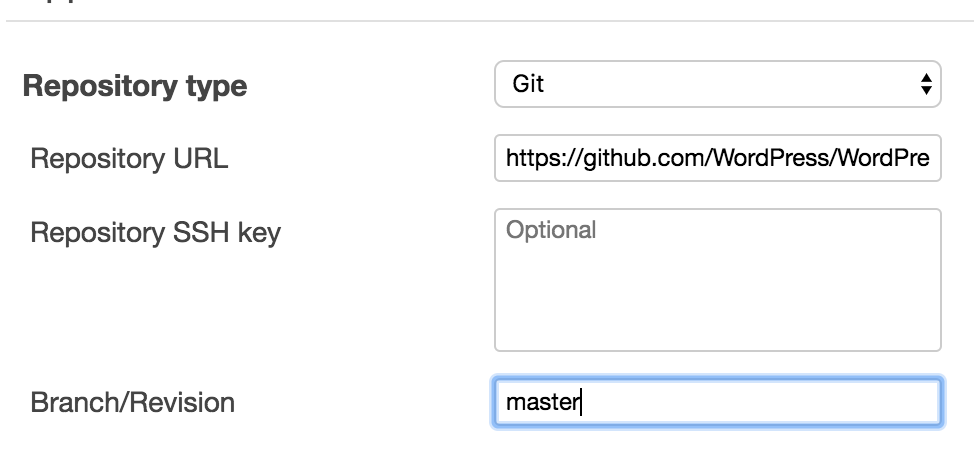
Setting your application repository
Now that we've set up our instances, it's time to set up the actual deployment.
OpsWorks has an "Apps" menu which allows you do to just that. All you have to do is just give it a name and select the repository, and that's it.
For the purpose of this tutorial, we're going to set up a Wordpress deployment, pure and simple, just to demonstrate the process.
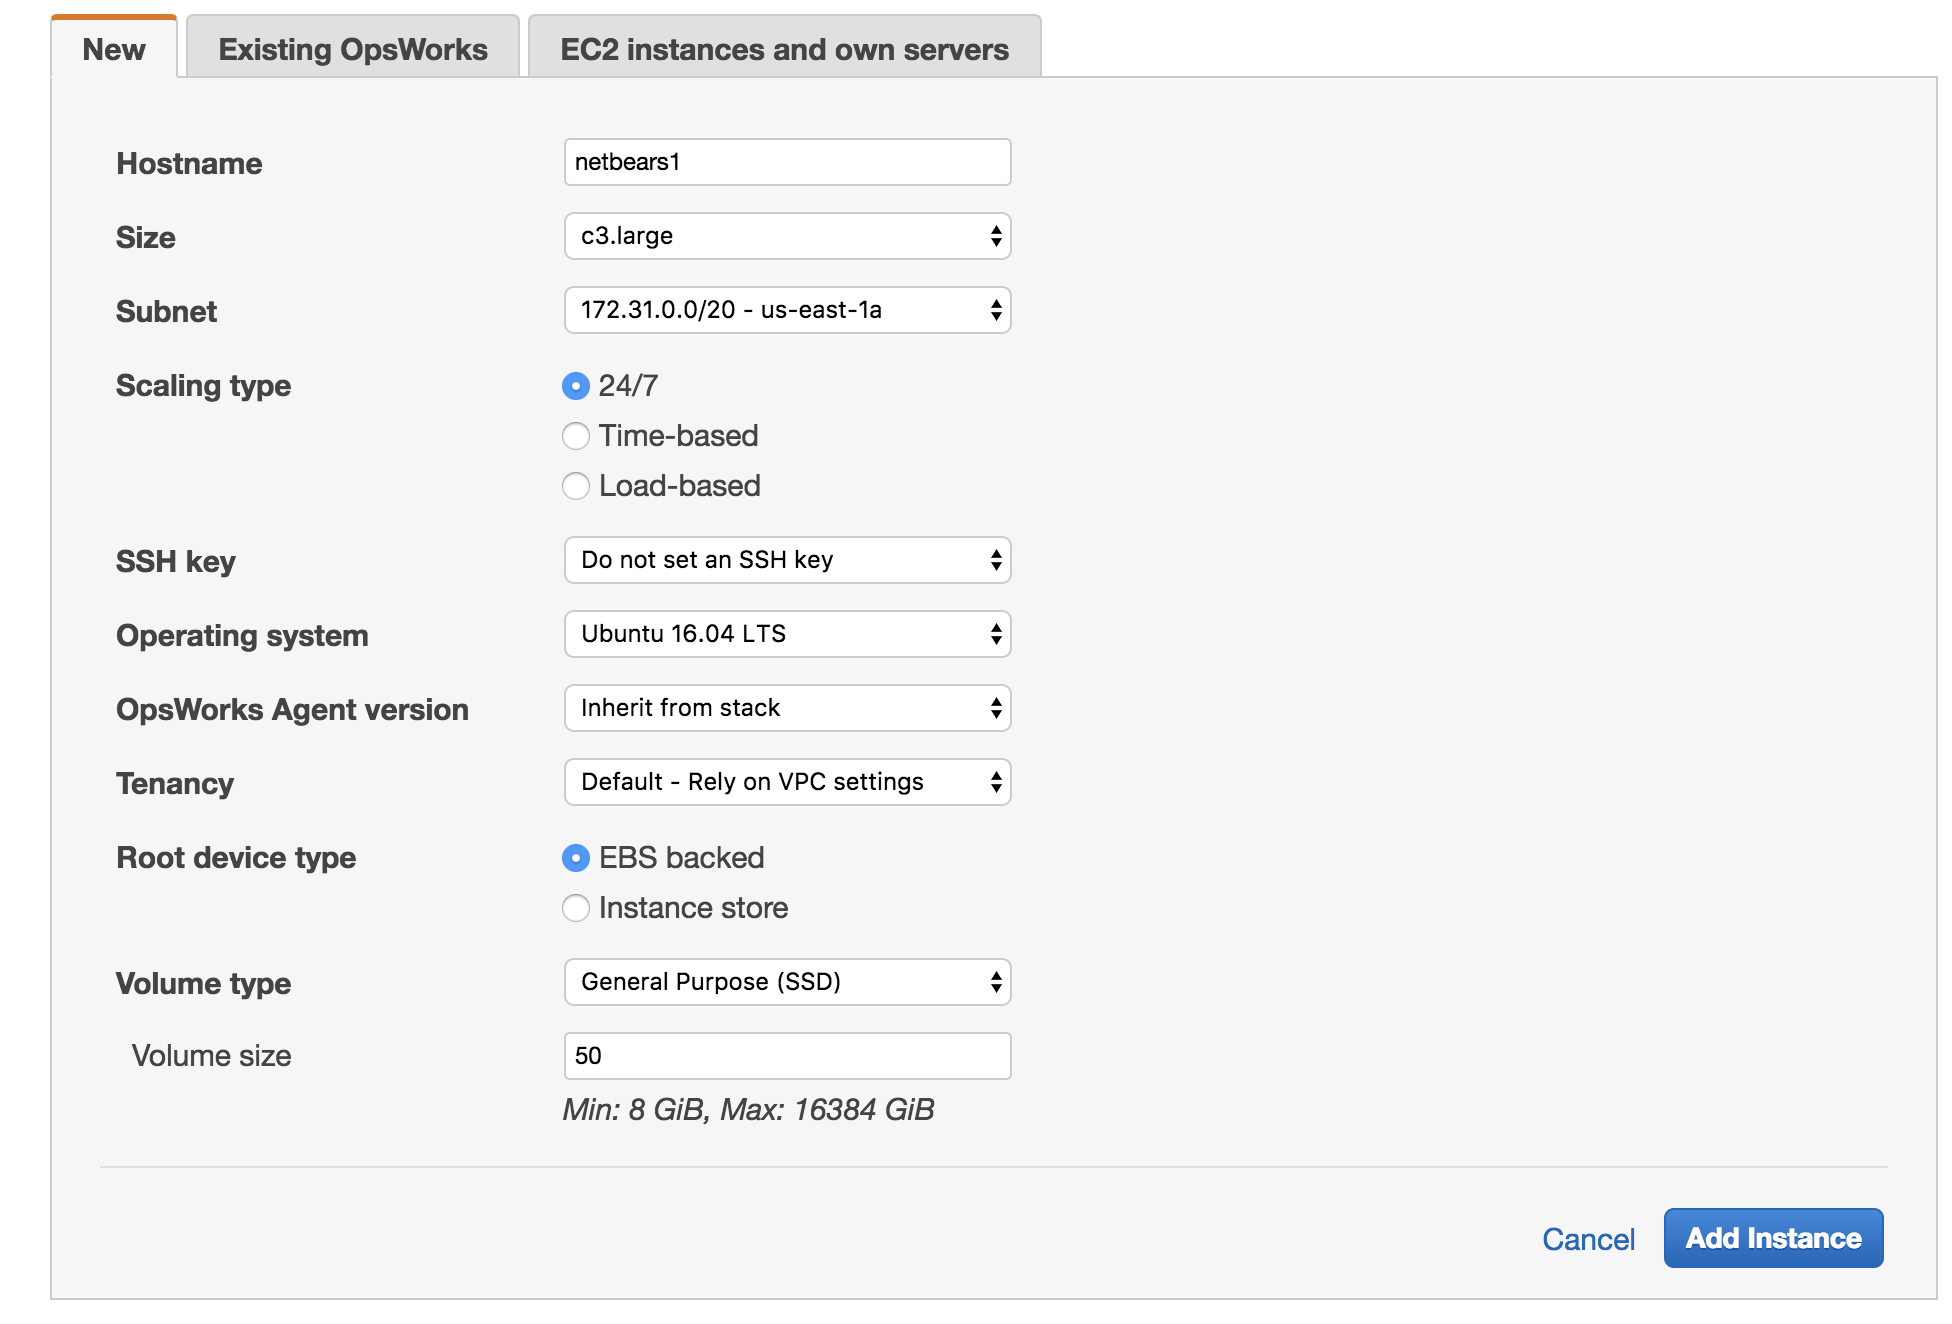
Launch your instances
This was it guys. It's now time to launch our first instance.
Let's go to our "Layers" and click on "Launch instance". Remember to increase the available HDD just to make sure you don't run out of space.
As soon as you start it, you'll notice that it might take a while, depending on the isntance you pick, how big your app, how many more customizations you've added, etc. But the most important part to remember is that the initial launch will consist of running both recipes : setup AND deploy.
Access the webapp
Now that you've launched your instance, all you have to do is just access your webapp.
Assuming that your ELB has proper healthchecks to decide when your instances are ready to serve requests, you should be able to access it directly.
In our case, since it's a Wordpress PHP app, we're presented with the initial WP config menu.

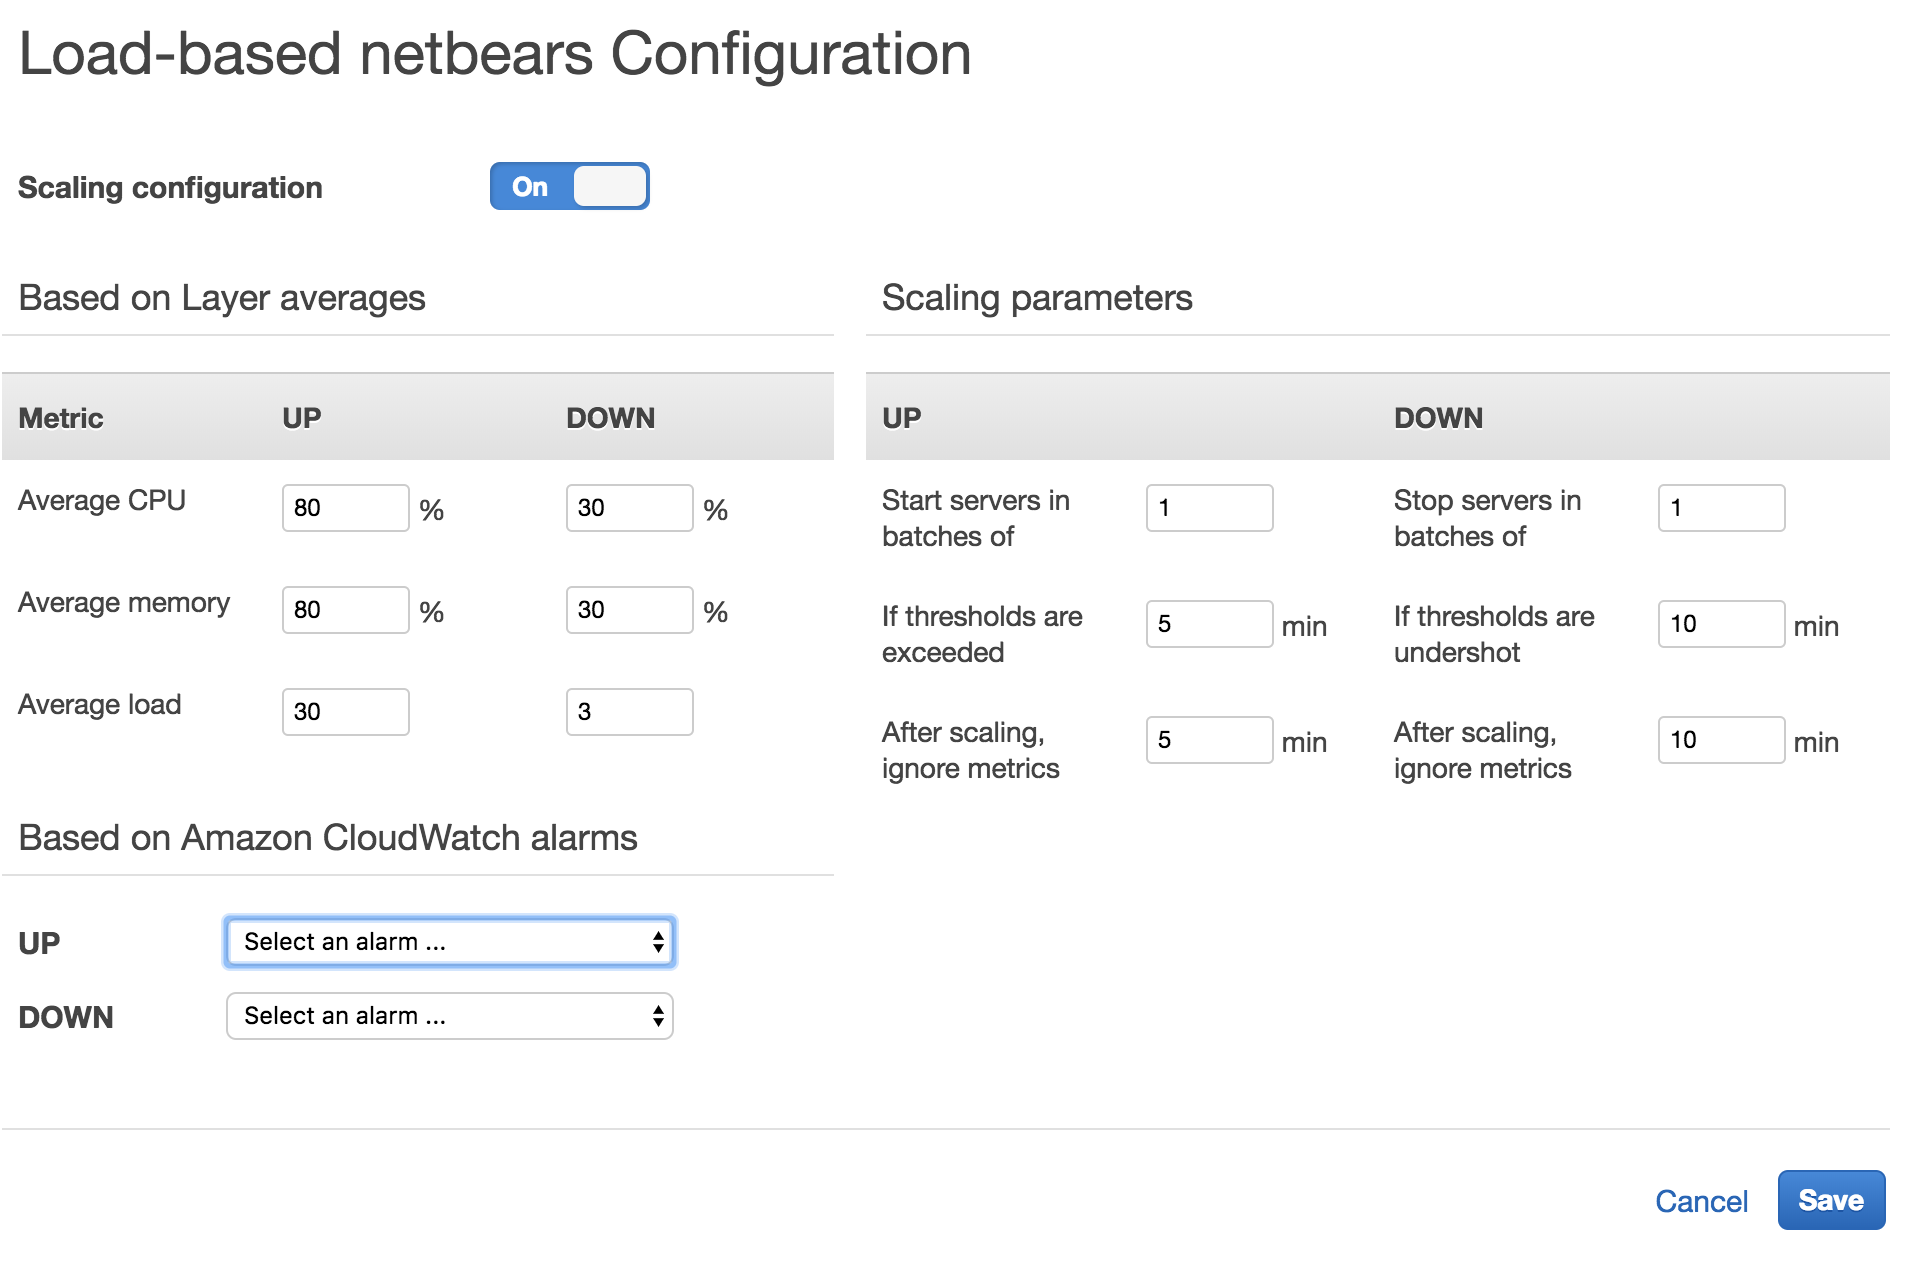
Autoscaling
Although this method presented in the tutorial looks like it requires manual input to launch and deploy new instances, that's actually not the case.
If we look closely at the instance type, we'll notice that it is using a 24/7 configuration. But, there's also another type in the list that we can use, which is Load-Based.
Load-Based instances act in the same way as the 24/7 ones do, but with the added feature that they only spawn when they are actually needed, based on specific metrics or even time triggers that we may choose.
The instance provisioning and the application deployment is of course being maintained by OpsWorks, so there's not much to do but just create them, and set the metric thresholds or time triggers when they are supposed to be launched.
Monitoring
The beauty of OpsWorks is that it also provides us with a few other metrics that are available exclusively through the OpsWorks console.
If you would look at the "Monitoring" tab, you will also notice that 4 graphs pop up:
- CPU system
- Memory used
- Load
- Processes
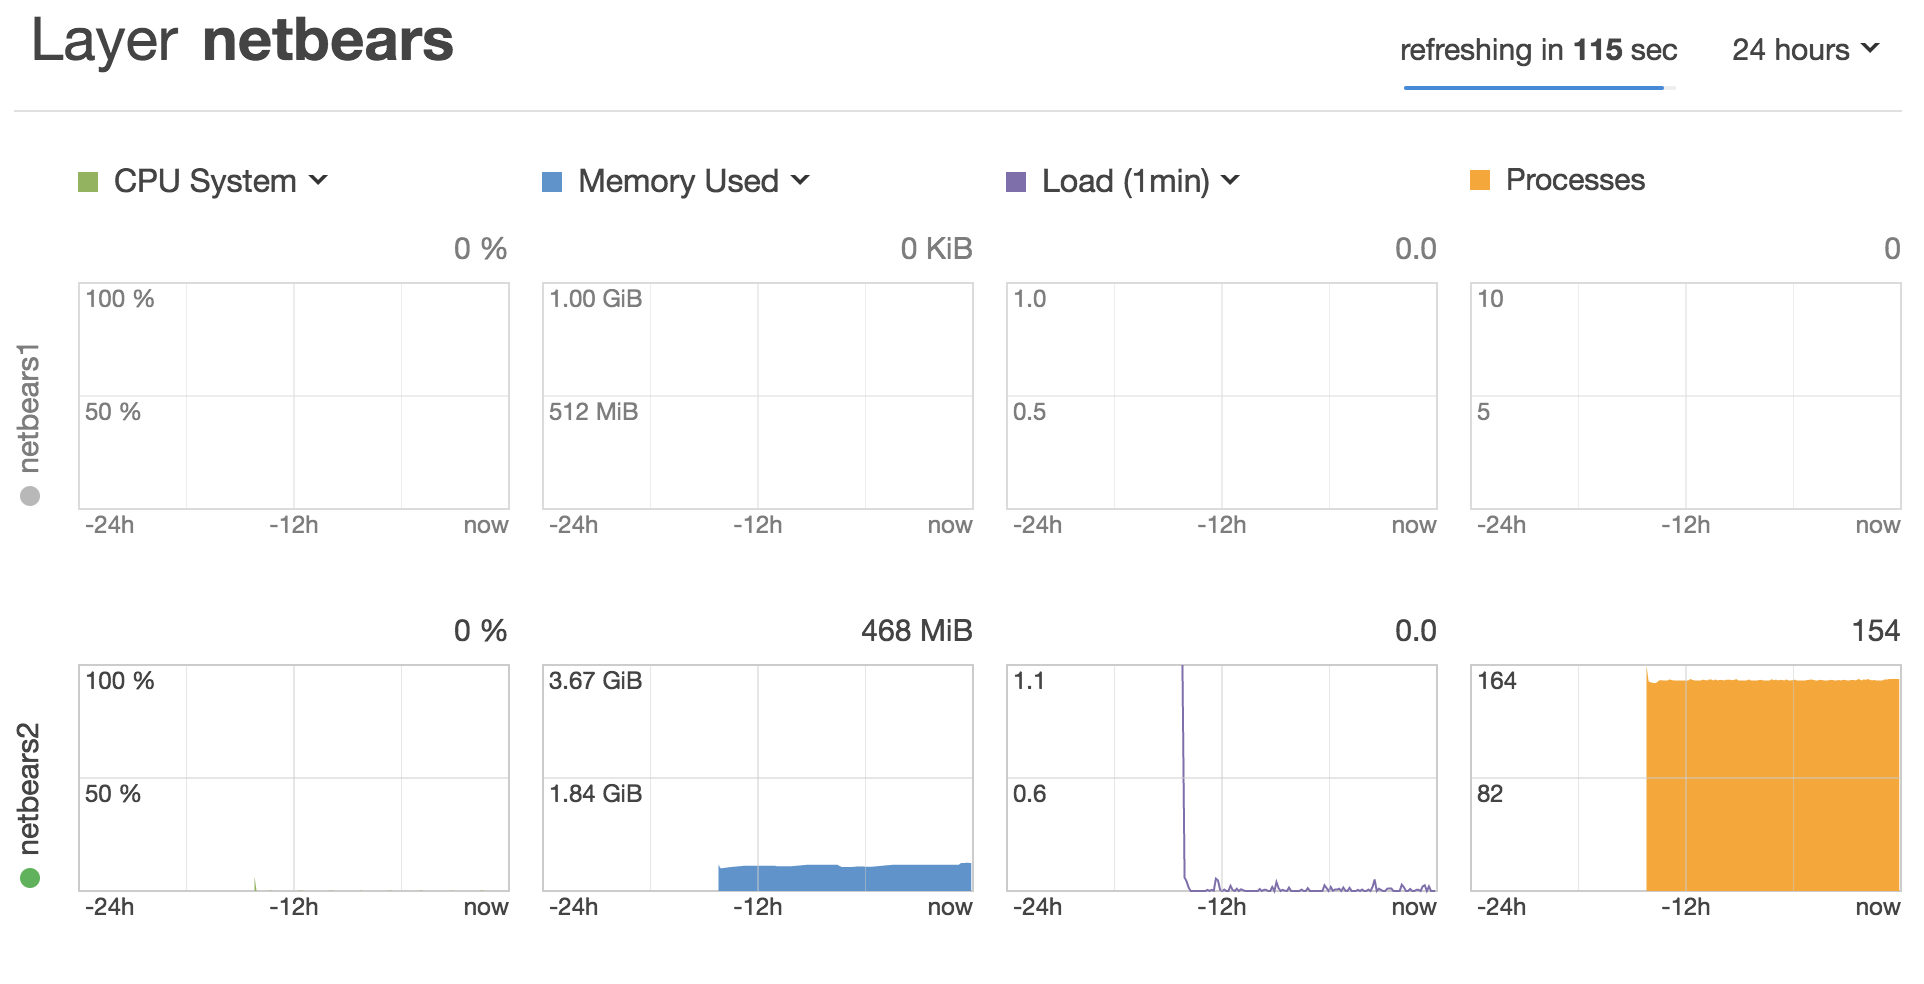
Although not really in-depth, they do provide a small overview of how your instances behave and do allow you to decide properly on the load-based thresholds that you should set up for autoscaling.
Fear not though, as our stack also comes in hand for this. We've also included NodeExporter in it, which, granted you already have a Prometheus node running, can be easily targeted to be scraped. Keep in mind though that you should also open the correct security ports for that to happen.
Final notes
Need help implementing this?
Feel free to contact us using this form or via email at